Choosing a Concrete Polishing Contractor

Concrete Polishing Contractor Waco TX specializes in the maintenance and restoration of commercial concrete floors. This process uses heavy-duty machines to grind down and smooth concrete surfaces to a desired level of sheen.

Concrete Polishing Contractor

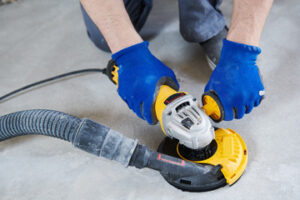
This is accomplished using grinding steps with progressively finer grit industrial diamonds. The process is followed by an internal impregnating sealer, which helps harden and dustproof the surface.

Concrete polishing is a great way to restore concrete surfaces and protect them from damage. It increases the hardness of the surface, which improves resistance to abrasion and weathering. It also makes the floor easier to clean and can help reduce the need for chemical cleaners. The process of concrete polishing involves grinding and honing the surface with heavy-duty machines. The result is a beautiful, glossy floor that can be easily maintained with regular sweeping and mopping.

A good concrete polishing contractor will have the equipment to do a complete job, and they should be able to communicate with their customers clearly. This is especially important in a large project where the scope of work needs to be carefully defined. A well-defined scope of work will prevent miscommunications and ensure that all parties are aware of what is expected from each other.

The concrete polishing process is a complex one, and it requires the use of special machines that produce a smooth finish. It is also an environmentally friendly process, as no harmful chemicals are used. It also eliminates the need for carpets and tiles, which can be expensive to replace or maintain.

Before starting the job, a concrete polishing contractor should evaluate the site and determine what kind of machinery will be required to do the work. They should also check the availability of water for cleaning and disposal of slurry, as well as electrical outlets for powering machinery. They should also make sure that the area is clear of objects and structures that could get damaged during the process.

Once the scope of work has been determined, the concrete polishing company will issue a quote to the customer. This document should include the price of the supplies, labor hours, and a margin to cover maintenance costs. The more detailed the scope of work, the fewer issues will arise during the project’s duration.

Concrete polishing is an excellent option for a number of applications, including retail stores and office buildings. Its high light reflectivity enhances a building’s aesthetic and promotes productivity. It is also more durable than other flooring materials and can be installed quickly. It is also easier to clean and resists stains and spills, making it ideal for commercial facilities.

Experience

Choosing the right concrete polishing contractor can help you save time and money and get the results you want. A reputable company should be able to provide references from previous clients and have experience working on a variety of projects, including hospitals, schools, government offices, and commercial needs. They should also be able to work with a variety of construction schedules to avoid any delays or interruptions.

A good contractor should be able to give you an accurate quote for the job in less than a day. They should also be able to answer any questions you might have about the project. They should be able to provide you with samples of the finishes they can achieve, as well as provide photos of other projects they have worked on.

Many grinding equipment retailers offer 2- to 3-day in-house courses to teach people how to use their products. These courses only scratch the surface of the complexities involved in concrete polishing, however. It takes years of on-the-job experiences to become a qualified polished concrete tradesman.

When you choose a contractor, ask about their work history and how long they’ve been in business. It’s also a good idea to verify their certification status with the American Concrete Surface Conditioning Association (ASCC). This will give you peace of mind that they are experienced and qualified to do the job.

You should also consider whether the company has the proper tools for the job at hand. For example, they should have access to water for auto-scrubbers and an electrical outlet to run electric-powered grinders. They should also have a safe and accessible place for slurry disposal. Finally, they should be able to arrange for transportation to the site and set up an electric generator, if necessary.

A quality concrete polishing contractor can create beautiful, durable floors that enhance the look of a facility. They can also add color to the floor by staining it with a wide range of colors, from neutral earth tones to deep jewel tones. Staining the concrete can also highlight patterns or shapes in the floor. This can make the floors more attractive and improve employee morale. In addition, stained floors are easy to clean and do not require the use of chemical cleaners, which can help reduce health and safety issues in the workplace.

Safety

Concrete polishing contractors have a responsibility to protect the safety of people in their workplaces. This includes ensuring that their employees wear protective clothing and take other precautions to minimize health risks. For example, they should use a respirator to reduce exposure to concrete dust. This is important because inhaling this dust can cause silicosis, a disease that causes symptoms similar to those of lung cancer. The contractor should also ensure that the workplace is free of obstructions and hazards before starting work.

Concrete cutting, surface grinding, and concrete floor polishing produce crystalline silica dust, which is dangerous to workers. Inhaling this dust can lead to a variety of respiratory diseases, including silicosis and chronic obstructive pulmonary disease (COPD). Those who work in these fields should wear a mask or respirator to prevent exposure to the dangerous particles. Moreover, they should wear a face shield to keep the dust away from their eyes.

In addition to the above safety measures, concrete polishing contractors should also follow all local and federal laws regarding waste disposal. They should use an approved waste container and dispose of it in a secure location. They should also ensure that they store all materials in accordance with their manufacturers’ printed instructions. In addition, they should keep a written document of the entire project, including responsibilities, and have all employees sign it at the end of the day.

A detailed scope of work will help the customer understand the work that will be performed. This will minimize the likelihood of misunderstandings and disagreements between the customer and the contractor. It will also ensure that the job is completed in a timely manner.

Dirty, dusty floors are a major contributor to slips and falls in commercial facilities. They can also affect employee morale. Polished concrete can make your facility look clean and improve its aesthetics while reducing the strain on maintenance staff. It is a cost-effective alternative to other floor treatments. It is also easy to clean and resists stains. If you want to add extra traction, you can apply a sealer that contains anti-slip grit additives.

Cost

Concrete floor polishing is a process that uses heavy-duty machines to grind and smooth the surface of existing concrete. It can make the concrete look like new, and it also provides a hard, durable finish that will resist scratches and stains. It is cheaper than installing other flooring materials, such as carpet, and it requires less maintenance over the long term. However, it is important to find a reputable company that will not charge too much for their services.

The cost of a concrete polishing contractor will depend on the level of shine that you want for your floors. Generally speaking, each additional level of shine tacks on an extra $0.35 to $0.75 per square foot. In addition, the costs of materials and equipment are factored in. Typically, concrete polishing companies will calculate these numbers for the customer before they issue a quote.

In some cases, the existing concrete may need to be repaired before the polishing process begins. This is particularly true in older warehouses that may have extensive damage from years of heavy traffic and use. Usually, the repair process will require an overlay that will be poured over the existing concrete before it can be polished. The overlay will add an additional $2 to $4 per square foot in addition to the costs of labor and equipment.

When a new concrete slab is being built, it should be designed to a very high standard in order to facilitate the polishing process. This will ensure that the finished product will be as durable and long-lasting as possible. In addition, the concrete must be poured to full depth and properly cured before it is polished.

Once the concrete is ready for polishing, the company will bring in a team of professionals to remove all the imperfections and dirt that may be present on the surface. In most cases, this will take several stages and will include the application of chemical densifiers that will strengthen the concrete.

The concrete polishing process can be messy and dusty, so it is crucial to have everything cleared out before the crew arrives. It is also a good idea to choose a non-busy time of year when the contractors can work more efficiently and save you money.

Getting Help From a Bathroom Remodeler

Many homeowners want to refresh their bathroom by painting, replacing fixtures, and adding a fresh shower curtain. However, if the remodel involves changing the size or layout of the room or moving electrical wiring or plumbing, it’s best to leave it to a professional.

Bathroom Remodelers Milwaukee has license, insurance, and bond. Ask to see these documents before hiring them.

bathroom remodeling

A bathroom remodel is expensive, but it adds value to your home. This is particularly true if you plan to sell your house. However, before you start the project, be sure to determine your budget and what you’re looking for in a bathroom remodel. This will help you avoid getting overextended and going over your budget.

The cost of a bathroom remodeling project can vary depending on the size and scope of the changes. For example, if you’re replacing the shower or bathtub, it will probably require plumbing work, which can increase your budget. You’ll also want to consider any other costs, such as drywall, flooring, vanity and sink. The best way to avoid unexpected expenses is to hire a professional.

Some homeowners choose to renovate a bathroom in order to update the style and functionality of the space. This could mean adding a new sink or moving the toilet, for instance. Other homeowners may want to include home accessibility installations, such as a walk-in tub or a handrail. This type of renovation will usually require a permit and more complex plumbing and electrical services.

Before you begin your bathroom remodel, decide on a design theme that will suit the room. This will determine how much you can spend on your remodel and what materials to use. For example, you might want a modern farmhouse bathroom or a classic style that will boost your home’s resale value. It’s also important to consider your color scheme and how the bathroom will match the rest of your house.

A bathroom remodeling contractor can offer advice on the best materials to use for your renovation. You should always compare the prices of different manufacturers and ask for quotes before choosing one. You can also save money by using existing fixtures and cabinets. However, this is not always possible, especially if you’re replacing the shower or tub.

When you’re remodeling your bathroom, it’s important to choose a quality product that will stand the test of time. Be sure to select a contractor that can offer warranties and guarantees. Also, consider if the company you’re working with has a good track record.

Bathrooms are small spaces, so careful layout makes a big difference. While it’s easy to get carried away with design, remember that you must also address practical concerns like space and plumbing access. A well-thought-out plan will make your bathroom a happy place for you and your family to enjoy. There are some basic bathroom layouts that are common in many homes. Use these as a starting point for your own design.

A bathroom remodel generally refers to changing the overall appearance of a bath, which can include a fresh coat of paint or new fixtures. This type of work is generally done to improve the look of a room without compromising functionality. It can also include removing or installing a shower and changing the location of a sink.

However, a renovation goes beyond simple changes and involves major structural work such as moving walls or altering the footprint of the room. This level of change requires professional expertise and may result in increased expenses.

In some cases, a renovation project might involve removing all of the existing drywall to expose the framing. This can be done for cosmetic reasons, such as making the space more open and modern, or it could be necessary to address safety concerns, such as lead paint.

Another option for a bathroom remodel is to add a second sink. This can be a real lifesaver for couples who share a bathroom, and it can also increase the value of the home in the long run. Other possibilities for a remodel include the addition of a tub or a walk-in shower.

For a really unique look, you can try a bathroom layout that includes a water closet. This can give the space a more private feel, and it’s perfect for smaller bathrooms. However, this layout is not for every space, so it’s important to think about the space carefully before you commit to this type of bathroom remodel.

When planning your new bathroom layout, it’s a good idea to create both a floor plan of the current bathroom and a diagram of the proposed layout. This will help you communicate your ideas to your contractor and ensure that the finished product will meet your needs. You can use a free software program to do this, such as RoomSketcher. It’s easy to use and offers a number of different designs to choose from.

The materials that you choose for your bathroom remodeler will be the foundation of its style and function. There are a variety of options available, from affordable laminate to high-end natural stone. When choosing your materials, be sure to consider how long you want the remodel to last and the level of luxury you want to achieve.

Bathrooms require durable materials that can withstand moisture and heavy use. It’s important to avoid porous materials such as wood and fabric, which can swell or become moldy when exposed to water. Additionally, it’s best to stay away from glossy surfaces that show every fingerprint and smudge.

In addition to being stylish, bathroom materials should also be easy to clean and maintain. Durable, low-maintenance materials like tile and solid surface countertops are a great option for bathrooms. If you’re on a tight budget, consider using laminate or other composite materials instead of natural stone.

During the design phase, it’s important to collaborate with your contractor and select materials that match your style and design goals. This will help ensure that the final product is consistent with your vision and matches your budget. If you’re unsure of what kind of look you want, start by looking for inspiration on Pinterest or Instagram to find the style that speaks to you.

After you’ve settled on a design and materials, make sure to get estimates from several contractors before you sign a contract. This will allow you to compare pricing and quality, and ensure that you’re getting the best value for your money. It’s also a good idea to plan out your budget ahead of time so you can identify any potential obstacles or unexpected costs.

Whether you’re planning a small bathroom renovation or a complete overhaul, a professional can help you create a space that is functional and beautiful. To get started, visit Sweeten to connect with a general contractor who is the right fit for your project’s location, scope, and style. Sweeten handpicks the best general contractors based on each client’s unique needs and connects them with projects that align with their skill set and expertise.

The design of your bathroom is as important as the budget or layout, as it can determine how well the project fits your lifestyle and adds value to your home. A designer can help you find a design style that matches your taste and budget, while also providing practical solutions for your bathroom layout and materials. They can also help you choose the right fixtures and materials, which will add to your budget as well as improve the functionality of your bathroom.

Creating a floor plan for your bathroom is essential to achieving a successful remodel. Using an online room planner allows you to create different layout options before making any final decisions. This will give you confidence in your plans and save time and money. Alternatively, you can draw a floor plan by hand and take measurements to get the precise dimensions of your space.

Bathroom remodels can be cosmetic, functional or structural changes. A cosmetic change is a change in aesthetics and may include replacing the floor, changing the color scheme or adding new fixtures and materials. For example, if you have an old bathtub that consumes the entire space and isn’t practical for your lifestyle, you could replace it with a walk-in shower. This is a functional change that will improve your daily life and increase the value of your home.

A major remodeling project can involve structural or layout changes, which will require more time and expense than a cosmetic or functional change. For instance, moving the toilet or sink to a new location requires plumbing alterations and wall alterations, which can be costly and disruptive. Larger-scale changes can even include removing walls, altering the roof and ceiling, or adding a window.

When performing a bathroom remodel, it’s important to consider safety and comfort. Older homes are often plagued with health and safety hazards such as broken or cracked tiles, lead paint, mold and mildew, and non-compliant fixtures. A bathroom remodel is an excellent opportunity to correct these hazards and prevent them from affecting your family’s health and safety.

Why Stucco Repair Is Necessary

Stucco Services

Stucco Repair can be a costly and time-consuming endeavor. Depending on what kind of damage your home is experiencing, you may need to invest in remediation instead of simply repairing surface issues.

Stucco ServicesLook for warning signs such as spotting, discoloration, and cracking. These are often indicators of underlying moisture that could lead to mildew, mold, and wall rot. To learn more about stucco repair, visit Stucco Repair Philadelphia.

Stucco has been a favorite building material for centuries. It adds visual interest and longevity to building frames, is easy to clean and maintain, and provides good insulation for the home. However, it can crack, especially in areas of high wind or where the structure is built on a weaker foundation.

Small cracks in stucco can be repaired with a little DIY know-how. You will need a caulking gun and some basic supplies, such as a cold chisel and hammer, masonry saw and blade and stucco mixture. Small hairline cracks can be easily filled with a caulk and painted over. The thickness of the paint bridges the crack and makes it essentially invisible. We recommend using Plascon Micatex paint because it is textured and much thicker than traditional paint, making it an excellent cover for cracks in stucco.

Larger cracks are more serious and require a complete repair process. Start by pressure-washing the crack and cleaning away any dirt or mold. Then, remove any loose plaster and replace it with new building paper and metal lath. This step is crucial for the integrity of the stucco and will ensure that moisture doesn’t get into the wall, which can cause further damage.

If the crack is only in the finish coat, wire-brush and wet the brown coat. Apply a fresh layer of bonding liquid and trowel in a new finishing coat. If the crack is in a deeper area of plaster, you will need to undercut it with a chisel and hammer. The goal is to widen the bottom of the crack, but only enough to allow for a mechanical key in (hold) the new stucco. Then, you can use the same technique as for patching and trowel in a fresh finishing coat.

For the cracks in your stucco that are larger than a dime, first, you will need to remove any loose or crumbling plaster and replace it with new building paper and lath. Then, you can use either a pre-mixed patch product that comes ready to trowel on or conventional stucco mix, mixed in a wheelbarrow or plastic tray according to the manufacturer’s instructions. If you are using a pre-mixed product, it’s important to choose one that is compatible with cement and will not bleed.

Remediation

Stucco is one of the most popular home-building materials today, especially in newer homes. While it’s beautiful and durable, it can also be vulnerable to moisture and mold problems. In such cases, a stucco remediation is necessary to prevent lasting damage to the structure of your home.

Remediation is a process that involves identifying the source of moisture intrusion and correcting it, which will ultimately result in replacing your building’s entire stucco system. It is typically the most comprehensive solution for this issue, and it minimizes the likelihood that you will need to make additional repairs in the future.

The first step in remediating a problem with your stucco is to remove any material that may be impacted by mold and mildew, including sheathing and plywood, as well as any insulation or OSB board that may have become saturated with these substances. This is an essential part of the process because it allows for a thorough inspection of the structure. It also helps to identify the extent of the damage and how it is affecting your home’s structural integrity.

A responsible remediation contractor will take the time to determine how water and moisture are getting into your home, because that is the only way to ensure it doesn’t happen again. This will include a careful examination of the stucco and surrounding materials, which can help to find the source of the problem.

When your stucco needs to be repaired, the first thing you should do is clean the area with a wire brush and cleanser. This will make sure the patch will adhere properly to the surface of your stucco. Next, pull back the metal lath on the non-damaged portion of your wall to expose the damaged area. Pulling back the lath will give you a little more space to work with, so it is easier to spot the problem areas and repair them.

Cracks and flakes are the most common warning signs of impending stucco failure, but you should also keep an eye out for staining around windows or doors, as this could indicate rotted wood or dry rot. If you notice these or any other signs of underlying damage, contact a stucco specialist right away.

Repairing Stained Areas

Stucco is a versatile material that comes in many colors and textures, but it can also be susceptible to moisture damage. While some staining is caused by severe weather events and overexposure to sunlight, a large portion of this problem stems from poor application and maintenance practices. Stained stucco is an indication of moisture intrusion that can have a major effect on the surrounding areas of your home. Remediation can be expensive, but it can prevent the need for future repairs and protect the interior structures of your home from water penetration.

The first step in repairing stained areas is to clean the affected area thoroughly. This is a delicate process that should not involve getting rough on the surface of your stucco. Instead, the best approach is to saturate or pre-wet the area with water so that any dirt and discoloration is drawn to the top of the wall. After the cleaning process, you should allow the area to dry completely.

If the stains are stubborn, you may need to scrub them off with a soft brush or a power washing machine. Once the stains are removed, you can apply a new coat of stucco to the damaged area. This should be a base coat that is a quarter-inch thick and should be a solid color. Once this layer is applied, you can apply a finish coat that matches the existing texture of your stucco. If you are unsure of the right mix to use, you can always purchase coloring pigment and add it into your mix until it matches the existing color.

While you may be tempted to paint your newly repaired stucco, you should wait a week before doing so. During this time, the stucco will continue to cure and will be a more even surface for your next coat of paint.

If your stucco is in need of minor repair, you may be able to tackle the project yourself with some planning and prep work. However, if your stucco is experiencing significant problems, it is important to consult with an experienced contractor to determine the best course of action.

Repairing Water Damage

Often when a stucco home has water damage, it isn’t something that can be easily fixed. That’s because the underlying issues have to be addressed in order to prevent moisture penetration, and subsequent problems such as mold or wood rot. In addition, this kind of damage can disqualify homeowners from making a claim on their homeowners insurance.

Luckily, a skilled contractor can repair the underlying issues and restore the stucco to its original condition. While remediation costs more than simply repairing cracks or staining, it protects your home from more costly problems in the future and can save you thousands of dollars.

When a stucco home shows signs of water damage, such as bubbling or blistering, it’s important to have it assessed by a professional. The reason is that the problem may be caused by a poorly installed stucco, which can lead to trapped moisture behind the wall and subsequent problems.

First, a qualified technician will perform an inspection to determine the cause of the moisture. This involves inserting a probe into suspicious areas of the walls and taking moisture readings. The results will show how much moisture is in the wall cavity, which can then be repaired and sealed.

Next, the damaged section of the stucco will need to be removed. A mason’s chisel or hammer can be used to remove the old stucco and loose materials from the wall surface. Once the area is clean, a layer of new stucco mix can be applied to the damaged area. This first coat is called a scratch coat and is usually brown in color. A notched trowel is then used to create grooves into the mud, which helps future layers adhere.

Once the scratch coat has set, a second and third coat of stucco can be applied to the area. The color of these layers can be chosen, but it’s best to keep the overall appearance of the house consistent. The new stucco can be sanded to smooth it before applying the finishing coating, which will be the final step of this process.